Using RBAC with Swift
This tutorial will show you how to use Swift in a RBAC enabled cluster.
Before You Begin
At first, you need to have a RBAC enabled Kubernetes cluster, and the kubectl command-line tool must be configured to communicate with your cluster. If you do not already have a cluster, you can create one by using Minikube. To create a RBAC enabled cluster using MiniKube, follow the instructions below:
If you are currently running a Minukube cluster without RBAC, delete the cluster. This will delete any objects running in the cluster.
minikube deleteNow, create a RBAC cluster with RBAC enabled.
minikube start --extra-config=apiserver.Authorization.Mode=RBACOnce the cluster is up and running, you need to set ServiceAccount for the
kube-dnsaddon to successfully run it.# Wait for kube-dns deployment to be created. $ kubectl get deployment -n kube-system --watch # create kube-dns ServiceAccount $ kubectl create serviceaccount kube-dns -n kube-system # Patch kube-dns Deployment to set service account for pods. $ kubectl patch deployment kube-dns -n kube-system -p '{"spec":{"template":{"spec":{"serviceAccountName":"kube-dns"}}}}' # Wait for kube-dns pods to start running $ kubectl get pods -n kube-system --watch $ kubectl version --short Client Version: v1.7.6 Server Version: v1.7.5
Deploy Tiller
Now, install Tiller server in your cluster following the commands below.
$ kubectl create serviceaccount tiller --namespace kube-system
$ kubectl create clusterrolebinding tiller --clusterrole cluster-admin --serviceaccount=kube-system:tiller
$ helm init --service-account tiller

$ helm version --short
Client: v2.7.0+g08c1144
Server: v2.7.0+g08c1144
Consult Tiller and Role-based Access Control for other configurations.
Deploy Swift
Now deploy Swift with necessary RBAc permissions using the following command:
curl -fsSL https://raw.githubusercontent.com/appscode/swift/v0.12.1/hack/deploy/swift.sh | bash
To check if Swift proxy pods have started, run the following command:
kubectl get pods --all-namespaces -l app=swift --watch
Once the proxy pods are running, you can cancel the above command by typing Ctrl+C.
Test Swift
To test Swift server, let’s deploy a test chart included in this repo:
helm install test/hello --name=tester
helm ls
Now, to expose Swift proxy using a NodePort service, run the following command:
kubectl patch svc swift -n kube-system -p '{"spec":{"type":"NodePort"}}'
Find out the ip address for the minikube cluster.
$ minikube ip
192.168.99.100
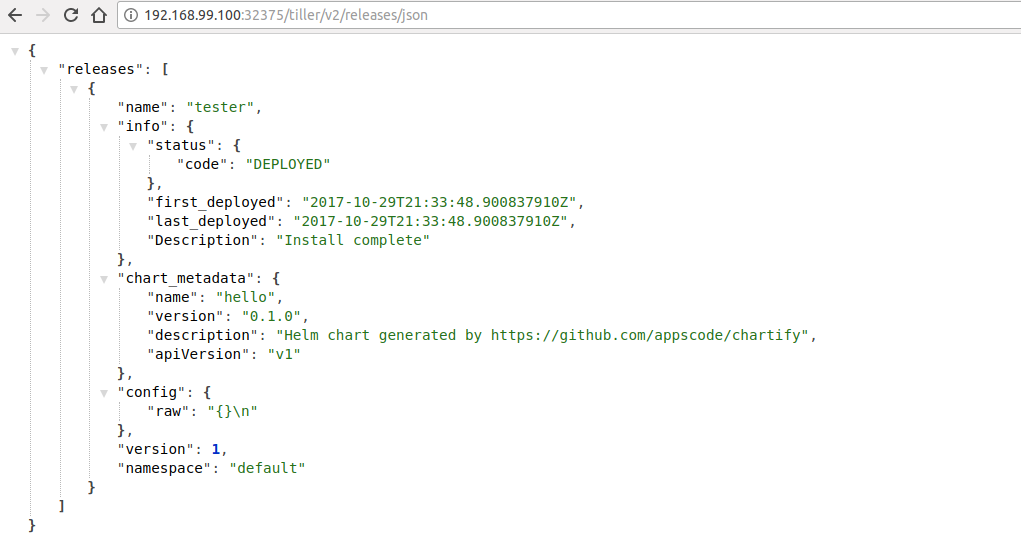
Now, open your browser and go to the following URL: http://{minikube-ip}:{9855-nodeport}/tiller/v2/releases/json.
Cleaning up
If you would like to uninstall Swift proxy, please follow the steps here.