New to Searchlight? Please start here.
Check node-exists
Check command node-exists is used to check existence of nodes in a Kubernetes cluster.
Spec
node-exists has the following variables:
selector- Label selector for nodes whose existence are checked.nodeName- Name of Kubernetes node whose existence is checked.count- Number of expected Kubernetes nodes
Execution of this command can result in following states:
- OK
- Critical
- Unknown
Tutorial
Before You Begin
At first, you need to have a Kubernetes cluster, and the kubectl command-line tool must be configured to communicate with your cluster. If you do not already have a cluster, you can create one by using Minikube.
Now, install Searchlight operator in your cluster following the steps here.
To keep things isolated, this tutorial uses a separate namespace called demo throughout this tutorial. Run the following command to prepare your cluster for this tutorial:
$ kubectl create namespace demo
namespace "demo" created

$ kubectl get namespaces
NAME          STATUS    AGE
default       Active    6h
kube-public   Active    6h
kube-system   Active    6h
demo          Active    4m
Check existence of nodes with matching labels
In this tutorial, a ClusterAlert will be used check existence of nodes with matching labels by setting spec.vars.selector field.
$ cat ./docs/examples/cluster-alerts/node-exists/demo-0.yaml

apiVersion: monitoring.appscode.com/v1alpha1
kind: ClusterAlert
metadata:
  name: node-exists-demo-0
  namespace: demo
spec:
  check: node-exists
  vars:
    selector: beta.kubernetes.io/os=linux
    count: '1'
  checkInterval: 30s
  alertInterval: 2m
  notifierSecretName: notifier-config
  receivers:
  - notifier: Mailgun
    state: Critical
    to: ["ops@example.com"]
$ kubectl apply -f ./docs/examples/cluster-alerts/node-exists/demo-0.yaml
replicationcontroller "nginx" created
clusteralert "node-exists-demo-0" created

$ kubectl describe clusteralert -n demo node-exists-demo-0
Name:		node-exists-demo-0
Namespace:	demo
Labels:		<none>
Events:
  FirstSeen	LastSeen	Count	From			SubObjectPath	Type		Reason		Message
  ---------	--------	-----	----			-------------	--------	------		-------
  19s		19s		1	Searchlight operator			Warning		BadNotifier	Bad notifier config for ClusterAlert: "node-exists-demo-0". Reason: secrets "notifier-config" not found
  19s		19s		1	Searchlight operator			Normal		SuccessfulSync	Applied ClusterAlert: "node-exists-demo-0"
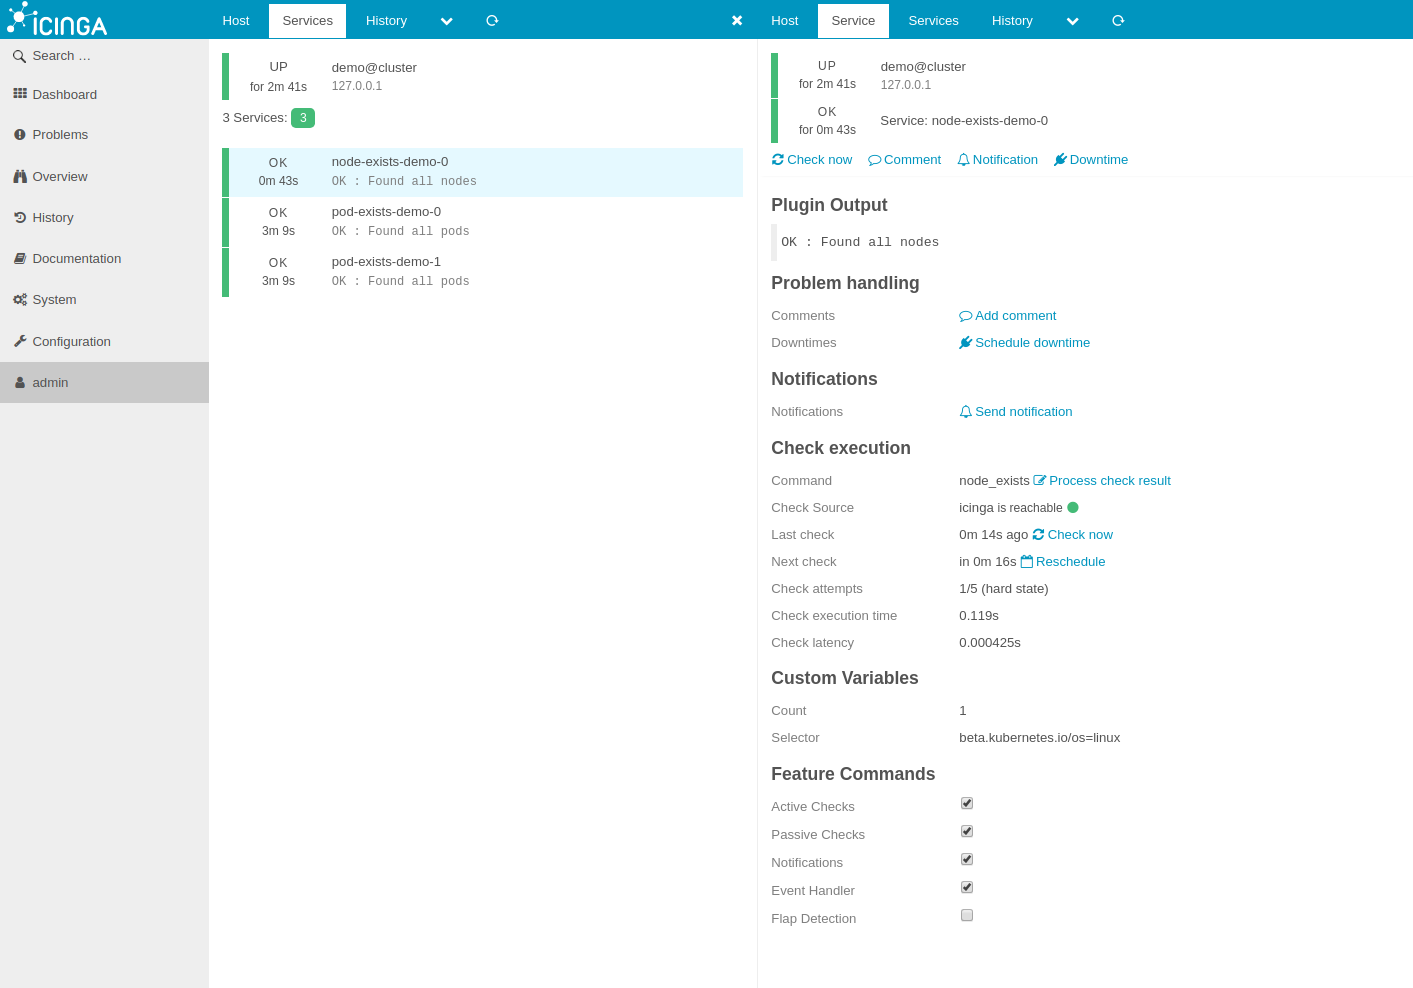
Voila! node-exists command has been synced to Icinga2. Please visit here to learn how to configure notifier secret. Now, open IcingaWeb2 in your browser. You should see a Icinga host demo@cluster and Icinga service node-exists-demo-0.
Check existence of a specific node
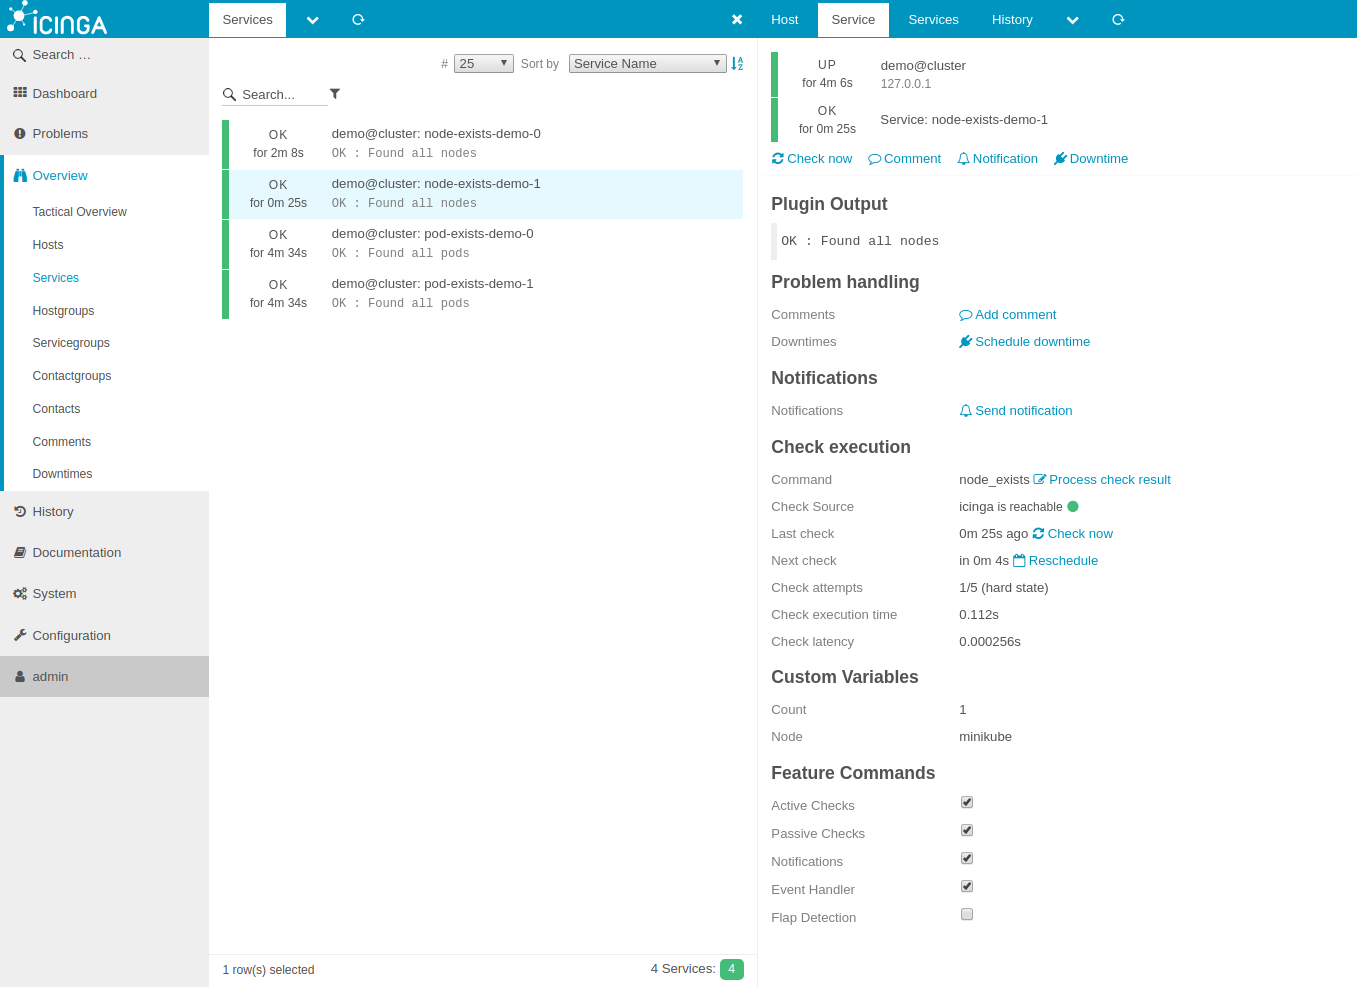
In this tutorial, a ClusterAlert will be used check existence of a node by name by setting spec.vars.nodeName field.
$ cat ./docs/examples/cluster-alerts/node-exists/demo-1.yaml

apiVersion: monitoring.appscode.com/v1alpha1
kind: ClusterAlert
metadata:
  name: node-exists-demo-1
  namespace: demo
spec:
  check: node-exists
  vars:
    nodeName: minikube
    count: '1'
  checkInterval: 30s
  alertInterval: 2m
  notifierSecretName: notifier-config
  receivers:
  - notifier: Mailgun
    state: Critical
    to: ["ops@example.com"]
$ kubectl apply -f ./docs/examples/cluster-alerts/node-exists/demo-1.yaml
node "busybox" created
clusteralert "node-exists-demo-1" created

$ kubectl describe clusteralert -n demo node-exists-demo-1
Name:		node-exists-demo-1
Namespace:	demo
Labels:		<none>
Events:
  FirstSeen	LastSeen	Count	From			SubObjectPath	Type		Reason		Message
  ---------	--------	-----	----			-------------	--------	------		-------
  31s		31s		1	Searchlight operator			Warning		BadNotifier	Bad notifier config for ClusterAlert: "node-exists-demo-1". Reason: secrets "notifier-config" not found
  31s		31s		1	Searchlight operator			Normal		SuccessfulSync	Applied ClusterAlert: "node-exists-demo-1"
  27s		27s		1	Searchlight operator			Normal		SuccessfulSync	Applied ClusterAlert: "node-exists-demo-1"
Cleaning up
To cleanup the Kubernetes resources created by this tutorial, run:
$ kubectl delete ns demo
If you would like to uninstall Searchlight operator, please follow the steps here.
Next Steps
- To periodically run various checks on nodes in a Kubernetes cluster, use NodeAlerts.
- To periodically run various checks on pods in a Kubernetes cluster, use PodAlerts.
- See the list of supported notifiers here.
- Wondering what features are coming next? Please visit here.
- Want to hack on Searchlight? Check our contribution guidelines.